

Finally I am getting round to posting photos of this gorgeous paper from the Sonoma WOTG
which I used with the 6x6 My Creations Display Album.
The 1st thing I did was to open up the spiral spine and ink distress the white album base
in Bamboo Ink.

On the page above I used an old pair of scissors and cut the large metal frame(from
the embellishment pack included with the kit) in half and tucked the cut edges under the saying.

I rolled the edge of the paper on the left hand side then 'popped' up the photo mat with

I used the waterbrush to give a soft color to the stamped image at the bottom.

I trimmed the extra paper away from the scalloped border on the zip strip

I love the metal corner embellishment on this page

This frame was the smallest of the 2 sizes and the saying fit it perfectly.

Again I used the waterbrush to color the image and then layered it on a tone-on-tone image.

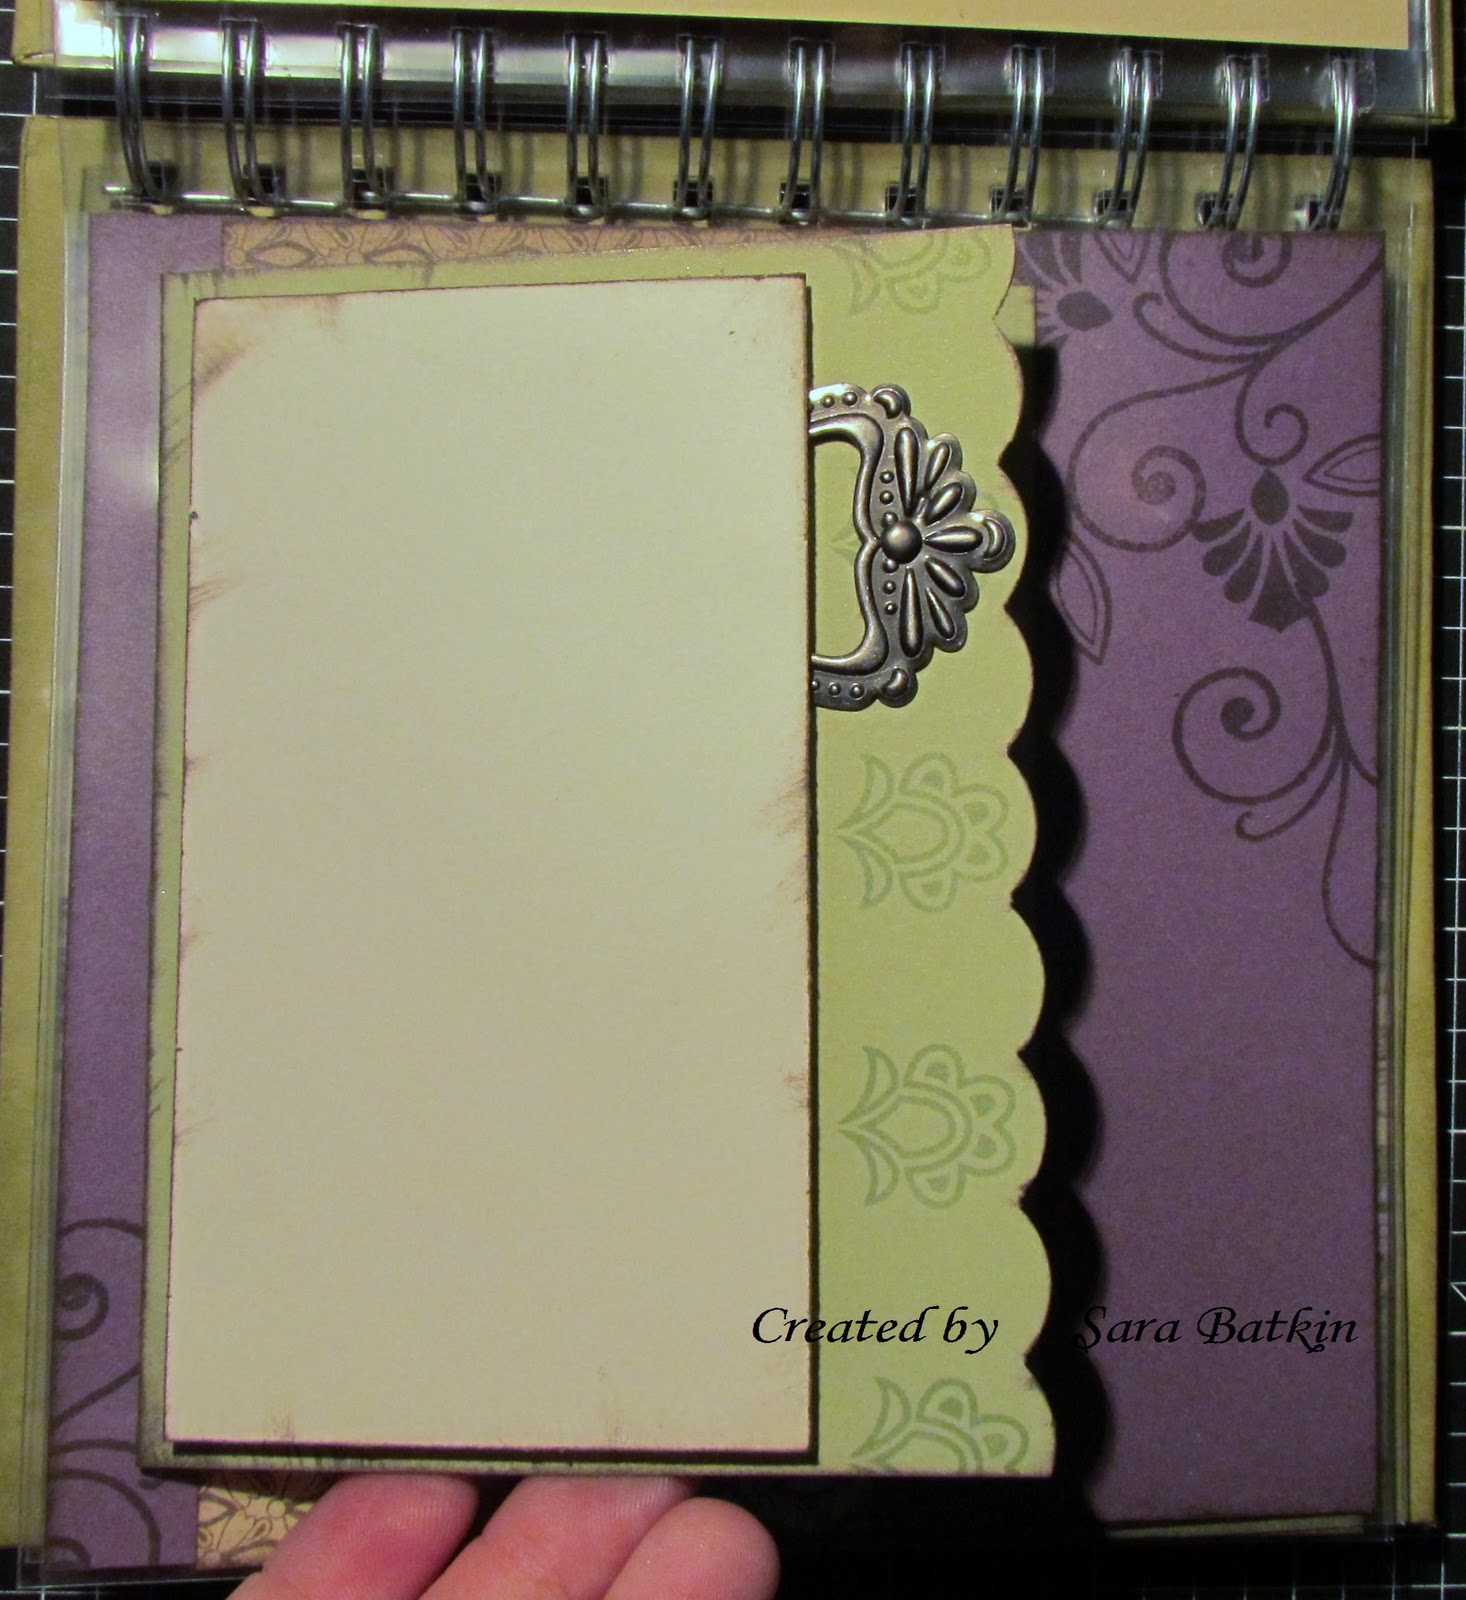
Here I cut through the page protector to make the album interactive (of course I did LOL)
The metal corner embellishment made a great 'pull tab' so I used 2 - back-to-back
to make it sturdy. The word LOVE is from the zip strip

I didn't glue the saying down completely so that I can still slide a photo underneath it.
Again I cut through the page protector to make a book style photo mat and here is the
other half of the large frame which I used on the 1st page

Again the trimmed scalloped edge zip strip, and I made the flower by stamping the leaf
6 times in a circle and then again - colored both and cut them both out then
layered them on top of each other.

The small flower was made in the same way at the one on the previous page -
I just made one layer and used the small leaf this time.
I cut a V shape into the end of the zip strip to give the illusion of ribbon.
I hope you like what I have done and it gives you the inspiration to make one of your own :O)
No comments:
Post a Comment