Thursday, December 26, 2013

Wishing you a wonderful holiday :O)

First of all - I would like to wish all of my fabulous blog followers a wonderful holiday and hope 
that you had a fabulous Christmas :O)

Secondly - I want to thank all of you who have emailed me personally and for friends who 
have supported me over the last few months.

As many of you know I spent most of this year going back and forwards to the UK to spend time with my parents as my Dad was diagnosed with Pancreatic Cancer in the Spring. Obviously every time I went back I then spent the next month or so running round like a chicken with its head cut off trying to catch up with all the things I had missed while I was away - only to repeat the process a few months later. As you can imagine I managed to lose entire weeks especially when you factor in the fact that both boys were in marching band this year so I was even more involved that usual with the band.

My beloved dad passed away at the beginning of October and I have to confess that the bottom dropped out of my world. I have a Dad shaped hole in my life and I have struggled so much with my grief - there are some days when it seems almost impossible.

The run up to Christmas has, in particular, been very difficult for me and whilst I am blessed to know that Mum spent the day with my 2 sisters and their families - it did make me feel even further from my family than usual.

With that being said - I will try to post a whole load of photos to try and play catch up LOL.

Wishing you all the best for a wonderful 2014 
Much love as always - Sara xxxxx

Monday, September 09, 2013

Design Decor Frame

Oh I am sooooooo in love with the new Colonial White Design Decor Frame - I love the country shabby chic feel to it with it's cool chicken wire.

I decided to make an advent style countdown to Christmas. 
I used the new Frosted paper pack and matching large felt flowers and made lots of 1" flowers with 
blush cardstock using the CTMH Art Philosopy cartridge. 
I used the same cartridge to make all of the boxes and the numbers and letters out of the 
Bronze Glitter cardstock.
Hope you like it - Love Sara xxx

Saturday, September 07, 2013

Tommy Workshop on the go - Double scrapbook layout

Hello everyone - here is a fabuous layout using the Tommy WOTG - I know it was hugely popular and this was designed by my dear friend Victoria as I was back in the UK and life was crazy.

Lots of Burlap ribbon give it that great nautical texture 

Even though the WOTG is no long available - Tommy Level 2 paper pack and
 co-ordinating canvas shapes ARE !!! 
Remember they are a limited time item and will be sold out before January so don't miss out :O)
Love Sara xxx

Friday, August 30, 2013

Summer Fun wall hanging

Here is one of the fun items I made for the CTMH Extravaganza 2013.
A cute wall hanging featuring my friend Jennifer's 3 adorable children.
I used the new Laughing Lola level 2 paper pack, Tan Glitter paper and the Color ready ribbon which I colored using sponges and Gypsy ink.
I cut the base using the new CTMH Artbooking Cricut cartridge. I used the Cricut Artiste cartridge to make the 3D flowers.
Cannot tell you how much I love this new cartridge - it is fabulous - lots of overlays for layouts and images for cards and pages and Mini Albums - WOOOHOOO :O)
Hope you like it - Love Sara xxx

Friday, August 02, 2013

A Chocolate Affair - August Stamp of the month

Oh this set is soooo much fun - I have had a great morning playing with this set. 
Who doesn't want chocolate!!
We will be making the adorable 'french fry' container at this months classes - perfect for putting candy and chocolates in - and how fun would it be if you made it in orange and black colors for Halloween :O)

Hope you like it and don't forget - you can get your set FREE with a qualifying order - either at my classes this month or on my CTMH website at sarabatkin.myctmh.com

Love Sara xxx

Thursday, August 01, 2013

WOOOOHOOOOOO ___The New Idea Book is HERE :O)

Can you tell I am excited???? Yes the New Autumn/Winter 2013 Idea Book is live and is full to the brim of fabulosity - beautiful papers, lovely stamps, bling, sparkle and more

Click  HERE  to visit my website and check out all of the new products so you can see what all the excitement is about - and whats even better??? 
The August Stamp of the month is FREE when you spend $50 or more :O)

As they say - you can never have too much chocolate -and when its free - It doesn't get any better than that :O)

Love Sara x

Friday, July 05, 2013

Hello peeps . . . .

. . .  yet again I am apologizing for my lack of posts on here.

Yes I taught at Extravaganza - photos to follow - yes I had a blast :O)

BUT I am having to fly urgently back to the UK to be with my father who is seriously ill with pancreatic cancer and wont last much longer. My heart is breaking not only for me but for my mama who is losing her best friend of 59 1/2 years.

So please be patient with me and I promise as soon as I am back I will post photos of the artwork.

But one more thing - this month Close To My Heart is selling the fabulous and fun Canvas WOTG Art Kit for just $19.95 instead of $39.95.. You KNOW it is while supplies last so follow the link and place your order online so you don't miss out xxxx

Love Sara x

Wednesday, May 29, 2013

Join the Pajama Party :O)


Close To My Heart is teaming up with Big Picture Classes to bring you a live webcast with step-by-step instructions for making this Happy Thoughts kraft container. 
The FREE webcast will air Thursday, May 30 from 7:00 pm to 8:00 pm (MDT). During the presentation, you’ll learn to make several projects from a variety of sponsors, including Close To My Heart’s Happy Thoughts kraft container, as the presenter walks you through the steps. Watch the Pajama Party as anyone with an Internet connection can watch :O)
The Pajama Party class will be available for FREE at BigPictureClasses.com on May 30. If you would like to interact on the message board, participate in live chat, post to the gallery, download handouts, or enter any contests, you will need to log in to the Pajama Party “classroom” by creating a free account on the Big Picture Classes website.
To make our Happy Thoughts kraft container, you will want to have the following items—or similar products—on hand:
  • My Acrylix® Frame Flair Stamp Set (D1546)
  • My Acrylix® Happy Thoughts Stamp Set (C1536)
  • Chantilly Paper Packet (need 1 sheet of B&T, X7163B)
  • Crème Brulee Cardstock (need 1 sheet, X5754)
  • Lagoon Cardstock (need 1 sheet, X5762)
  • White Daisy Cardstock (need 1 sheet, 1385)
  • Whisper Cardstock (need 1 sheet, X5929)
  • Whisper Exclusive Inks® Pad (Z2172)
  • Lagoon Exclusive Inks® Pad (Z2195)
  • My Creations® Kraft Container (Z1833)
  • Baker’s Twine Neutral Assortment (need 3 yards, Z1701)
  • Color-Ready Trinkets Wooden Shapes (Z1844)
  • Sparkles Black & Grey Assortment (Z1754)
  • 3-D Foam Tape (Z1151)
  • Micro-Tip Scissors (Z534)
  • Corner Rounder (Z578)
  • Paper Trimmer (Z1783)
  • My Acrylix® Spritz Cleaner (1778)
  • My Acrylix® Stamp Scrubber (Z1782)
  • 2" × 3½" My Acrylix® Block (Y1009)
  • 4" × 5" My Acrylix® Block (Y1012)
  • Cricut® Art Philosophy Collection (Z1686)
  • Join me and have fun at the Pajama Party :O)

Wednesday, May 08, 2013

Marker Magic

Click on the title to watch a fun video showing you show to use our great Alcohol Markers in all of the fun Close To My Heart Colors.

Wednesday, May 01, 2013

'Dream Pop' Cricut Flower Mini Album

This paper and cardstock  is so much fun  - it screams Summer and Popsicles and Sunshine and I LOVE IT !!!
The fun patterned paper and glossy embossed cardstocks have been specifically designed for National Scrapbooking Month and just for this one collection 
- you can't help but smile when you look at it :O).

There is NO STAMPING on this fun mini album which I designed - just paper, cardstock and embellishments. I saw a fabulous butterfly shaped album designed by the super creative Wendy Coffman over at Stamping Rules and loved it so much that I decided to make one of my own.
I used the CTMH Art Philosophy Cruict cartridge to cut the page shapes out - I cut them at 11 1/2" inches and the overlays were cut at either 11 1/4" or 10 1/2".
 I cut flowers from 2 of the cardstock colors for the front to cover the words on this panel.
The words My Favorite were from the Zip Strip. 
I added the Black and Grey Glitter Paper to accent the pages and to form the base of the middle pages.  I gathered the Slate Polka Dot ribbon to cover the spine of the pages and to tie the album together.
 I added Z1754 Black & Grey sparkles in the center of the flowers
 I also added Z1807 Pink Glitter Gems.
 The words Beautiful were cut from the side of one of the sheets of paper.
On the layout above I cut the right hand page from the left hand side of the sheet of patterned paper and the left hand page from the right hand side of the paper.
 I cut the flowers out of another sheet of paper.
 Another Zip Strip saying was used on the page above.

The collection includes 12 sheets of fun double sided patterned B&T Paper and 12 sheets of embossed cardstock (embossed one side and plain the other) and is valued at $19.95.
You can receive one packet of Dream Pop  for just $10* for every $35 you spend.
Hostesses will receive one paper packet free with a qualifying May Gathering sales total of $400 or more and is available between May 1st-31 2013 only - while supplies last.

(* Shipping/handling and tax apply. Not available for purchase at full retail price). 


Friday, April 19, 2013

Terri's Mini Album Giveaway

A few weeks ago I was celebrating the amount of 'hits' here on my blog and I promised artwork if you commented - well its taken me this long to make, and photograph and to mail this 51/2" mini album to the fabulous Terri Howard whose name was pulled out of a hat by my son Elliott.

I used my most favorite of all time paper pack - Perfect Day to make it and added fun embellishments - I have to fess up that not all of the metal accents are CTMH's - but I did use the Perfect Day stickease and some of my carefully horded Cocoa grosgrain ribbon.
 This shows the covers when they are open.
Then the 1st page opens to reveal 2 more 'doors'.


Terri - I hope you like it  - Love Sara xxx

Wednesday, April 17, 2013

I am teaching at 2013 CTMH Extravaganza and here is a piece of my submission artwork :O)

When Close To My Heart asked for artwork submissions for this years teachers for Convention's Extravaganza classes I wasn't sure whether or not to apply - I have taught for the last 4 years in a row and wasn't sure that I had anything new or different to submit and would they want me - I know that the 
ladies and gentlemen who take my class really seem to enjoy it but would CTMH want someone new this year - The though of submitting artwork and then not being chosen would be hard for me LOL.
But I decided that I would submit anyway and keep my fingers crossed in the hopes of being chosen.

I received the email last week confirming that I will be one of just 18 teachers (there were 32 of us last year!)  
To say that I am excited would be an understatement.!!!

So - I thought I would share one of my 5 pieces of submission artwork with you today.
Here is a 5x7 card I made using the For Always Level 2 paper pack along with some Buzz & Bumble paper - I know I can hear you saying to yourselves - Sara NEVER combines paper packs !!!
I KNOW ! - this is so far out of my comfort level hahaha.
 I sponged Autumn Terracotta, Honey and Creme Brulee inks in diagonal bands across the For Always paper so the color graduated from the darker color in the bottom left corner 
and ending with the lighter shades in the top right.
I dry embossed the black cardstock and used the Corner Rounder with the guide removed to scallop the edges of the Autumn Terracotta cardstock then ink distressed the 
surface of the cardstock to give it a darker hue. 
I also scalloped the edge of the horizontal strip of Black cardstock.
The other 2 squares are the honeycomb pattern B&T from Buzz and Bumble.

I added the Opaques Cream Pearls in a curve around the top of the heart and added a layer of 
Liquid Glass to cover the whole heart.

The saying  'Made with" is from D1542 For A Friend - and again stamped with Archival Black ink, sponged with Autumn Terracotta and Honey inks and then Create-a-Shade Peal Paint and the saying stamped over the top.
The word LOVE was stamped using the new B1416 Keyboard Alphabet - such a useful little alphabet set - and cut out and attached to the back of the heart.
To finish it off I added the Rosette Ribbon and added more of the large Opaques Cream Pearls in the centers of the rosettes and to the centers of the scalloped edge of the black cardstock.

Hope you like it - Love Sara x

Monday, April 15, 2013

Buzz & Bumble Display Tray

I absolutely love how this project turned out. It was based on one made by the  talented Lisa Stenz.
It features the My Creations Display Tray which is made up of 12 compartments. As you can see from above I didn't put photos in all of the sections. Some I covered almost entirely and some I added sentiments.

I used the paper and cardstock and stamp set from the Buzz & Bumble Workshop on the Go and then added a few extra embellishments.
I added the Honeycomb Stamp set, and the D1544 Distressed Backgrounds (on the Heart).

 The embellishments I used were Brocade Assortment, Heart Dimensional ElementsRosette Ribbon
Dark Chocolate Grosgrain Ribbon, Color Ready Trinkets Wooden Shapes, Artisan Studs and LOTS of Liquid Glass - of course I did - I don't think I am able to make a project without Liquid Glass :O)
 This shows the embellishment cluster on the main photo.
 Elliott's photo lifted up to show another photo of him.
I used the Piercing Tool Kit to make rows of holes to make faux stitching around the honeycomb shapes.
I am so excited with the finished result and can't wait to hang it up :O)
Hope you love it too - Love Sara xxx

Friday, April 12, 2013

Buzz & Bumble Workshop On The Go

 Oh how I love this card. Pure Sara !
Hope you like it too as this is one of the cards we are marking in March :O)
I used the Buzz & Bumble WOTG and then added some of the new Brown & Tan Glitter Paper.
We will use the Watercolor Pencils to color in the images to give them a very soft look.
I used the Corner Rounder to scallop the edge of the Olive cardstock.
It is difficult to tell but the word 'Seed' is filled in with Liquid Glass.
I added Bronze Glitter Glitz Gel Glue to the centers of the flowers.
Hope you like it  - Love Sara xxx

Thursday, April 11, 2013

Monster discount (and it isn't Halloween!!!!)

It's not Halloween - BUT - If you REALLY love the CTMH products as much as I do, & would love to get an MONSTER discount on CTMH’s      quality crafting items - April is the PERFECT month!!

When you join my CTMH team between April 1st - 30th. . . . . . 

you will receive an extra $71.80 in stamp sets absolutely FREE!!!!


RECEIVE the 4 STAMP sets pictured above (EXCLUSIVE Stamp of the Month stamps - April, May, June & July) 

 PLUS  you will receive the basic Essentials kit  pictured below…

for ONLY $49!!! (plus S&H and Tax)

- Retail value  $255!!!! - That's a discount of  80% !!

I would  LOVE to share with you how CTMH can work for you!  
When you become a  CTMH consultant, YOU get to CHOOSE how you would like to share and sell CTMH!* 

You can keep the product or share it with your friends or share the  'Love' with new friends - it is entirely your choice :O)

CLICK HERE to Join my 'Legacies of Love Team' and become a consultant today x

Wednesday, April 10, 2013

Buzz & Bumble Honeycomb Card

I have to say that Buzz & Bumble is my favorite paper pack in the new Spring Summer 2013 Idea Book.
I love the vintage feel to the papers and co-ordinating stamp sets.
This is one of those stamp sets - C1537 Honeycomb and it is already proving to be very popular 
with my customers.
Here I added it to the Buzz & Bumble Workshop on the Go and then accented it with some of the new Brown & Tan Glitter Paper - you KNOW I am loving this stuff !!!
I dry embossed the background of this 3x6 card and ink distressed everything in Desert Sand Ink
I stamped the sentiment from the WOTG ink Cocoa ink and added some of the brown sparkles that come in the kit to the top and bottom of it.
I also added them to one of the Honeycomb shapes.
These were stamped in Honey, Goldrush, Bamboo and Cocoa inks.
Hope you like it :O)
Love Sara xxx

Monday, April 08, 2013

My Sunshine - March Stamp Of The Month

 What a fun Set :O)  I am loving the great Spring/Summer feel to these cards - banishing the Winter Blues !!
The first card uses the new Claire Level 2 paper pack as I love this Sunset colored diagonal pattern.
Cocoa cardstock forms the base and I added a touch of Outdoor Denim Ink, Chocolate Ink and Sunset ink.and cardstock and lots of Clear Sparkles. This is one of the cards my classes will be making this month.
 On this next card I dry embossed the background and then ink distressed with Desert Sand Ink.
Again I used the Claire Level 2 paper Pack - this time the Denim print paper.
I cut the Hot Air Balloon balloon 6 times and stamped it in Sunset ink and layered them to give them a fun flower feel.
 This summery card has a Topiary Heat Embossed background with sanded Creme Brulee Cardstock
I stamped the Hot Air Balloon in Pear ink  and then Rolled the edges in Topiary to give it a shaded look.
 This lovely card featuring the Tommy Level 2 paper pack was made by my dear friend Victoria Fage and I fell in love with it. She added a piece of Burlap Ribbon and a large pewter brad from the Brads Metal Assortment  for texture.
 Claire Level 2 paper is featured on this card. I stamped the bird in Chocolate ink and added the wing ink Sunset ink. I stamped the new D1544 Distressed Backgrounds on the Cashmere cardstock. The Outdoor Denim Chevron Ribbon is perfect for this card. The flower is made using the 2" Scallop Punch which is fan folded and cut on every other fold.
This card was inspired by a card made by the very talented Aaron Brown. 
I used Chantilly paper on this little 4x4 card. I used Cotton Candy cardstock and patterned paper and the Cotton Candy Ink for the bird for a very monochromatic look. I cut the birds wing out of the green paper from the kit. I distressed everything in Cocoa Ink.
I scalloped the bottom edge with the Corner Rounder and added Pink Glitter Gems and the Rosette Ribbon.
Hope you like them - Love Sara xxx

Friday, April 05, 2013

Chantilly Scrapbook Workshop On The Go Bracket Frame

Here is the frame which I made after being inspired by the artwork on page 16 of the 
2013 Spring/Summer Idea Book. I used the Chantilly Scrapbooking WOTG.
I started with the My Creations Bracket Frame and painted it with the Pearl Paint and the brush in the Texture Tool set. I added the Chantilly Fabric to piece of thick chipboard which I cut to fit.
I used the paper and cardstock in the Workshop on the go to make the flowers and leaves which I cut out using the CTMH Art Philosophy cartridge. The flowers were cut at various sizes the largest being 3.5" and the smallest being 1" - I used the Quilling Tool to roll the flowers.
I added a pink sparkle from the WOTG to the center of every flower.
Some of the flowers were sponged in Cotton Candy Ink. Other flowers I added Prisma glitter to using the Bonding Memories Glue Pen. I also added new Wooden Mini Medley - first I rubbed the wooden pieces on the Cotton Candy Ink Pad then added Liquid Glass to them. 
I stamped some of the leaf shapes using the stamp set which comes in the WOTG ink Pear ink and then added Liquid Glass which when it was dry gave them more of a yellow/green shade.
I wrapped the Chantilly fabric around a length of Burlap Ribbon to make the fabric stiffer - and stitched it on my sewing machine. Then I looped it on the frame and made a faux bow.
I used the small journalling area stamp from D1526 Family Tree to make the tags for the letters and used one of the most popular alphabets D1469 Polka Dot Alphabet for the word WELCOME.
The hemp bakers twine and buttons come from the Mini Medley.
Finally I added everything to the frame with Liquid Glass and added the Chantilly Buttons - again they come in the WOTG kit - to add even more texture.
 Here is a close up of some of the flowers
This shows how I stacked some of the flowers on top of each other to add more dimension.
I absolutely LOVE the way it turned out and hope you do too - Love Sara xxx

Tuesday, April 02, 2013

Chantilly Scrapbooking Workshop On the Go

 This is the super cute stamp set in the Chantilly Scrapbooking Workshop on the Go
I love the different segments and what is even more fun is that they fit PERFECTLY into 
D1545 Wheel of Life which is featured on page 77 of the Spring/Summer 2013 Idea Book .
I really like the leaf image which has a swirl feel to it and the fun mini phrases are perfect for pages or cards.
On this 3"x6" card above I used Pear ink to stamp the leaf in the top right hand corner.
The scallops were made with the Corner Rounder with the guide taken off.
I then added the holes with the Piercing Kit.
The pretty little flower was cut out on using the CTMH Art Philosophy cartridge
The more I looked at the segments I could see other images which could be created - so made this fun birthday card by making one of the segments into a party hat with a glitter button on the top of it with a Clear Sparkle in its center.  I dry embossed diagonal lines into the Sweet leaf cardstock and then heavily ink distressed it ink Sweet Leaf Ink. I sponged Cotton Candy ink onto the Black and White Grosgrain Ribbon.
As soon as I saw the segment with the leaves on it I knew it would make the cutest little tree.
I added Sparkles to it and used a small scrap of the Pear and partridge paper.
A little piece of Burlap Ribbon - frayed on all 4 sides - added a more country feel to it.
Well I hope I have given you lots of ideas with this set.
Love Sara xxx

Saturday, March 30, 2013

Chantilly Cardmaking Workshop On The Go

 
I do love this card featuring the Chantilly Cardmaking Kit.
The ink of Lagoon, Sweet Leaf, Sunset and Desert Sand. This combination makes it perfect for boys or for girls. I made this one without the flowers to make it more suitable for a boy.
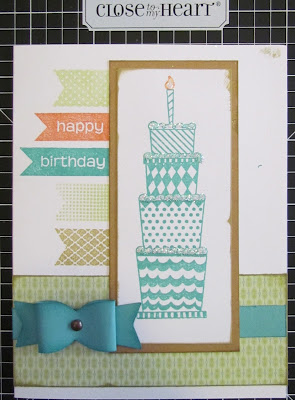
I added Liquid Glass and Prisma Glitter to the icing on the layers of the cake and onto the candle flame to add some sparkle.
The bow was made from the CTMH Artiste Cricut Cartridge and secured it with a Pewter Brad from the Metal assortment.
I decided to show the versatility of this kit and created this fun layout using the stamp set which is included in the card-making it. I think it is just perfect for this layout. I used the same ink colors as on the card.
I did add a couple of alphabets to this layout.
The word 'Birthday' was stamped using A1117 - A Typeface and Outdoor Denim ink and the word 'Wishes' used one of my favorite sets D1507 - Urban Alphabet.
Two pieces of Silver Shimmer Trim added more sparkle to the Birthday Cake accent piece and 
Clear Sparkles added some bling between the letters of 'Birthday"
Hope  you like it as much as I do :O)
Love Sara xxx

Thursday, March 21, 2013

March Stamp of the Month - Floral Happiness

Oh I am loving this pretty floral stamp set - the solid image stamps with the co-ordinating layer make it quick and easy to create pretty roses without having to color the image.
 This first pretty card is done in shades of Smoothie Ink with Olive leaves and cardstock layers.
I will be teaching how to  make this fun card with its layered style in my July classes with a 
different stamp set.
 For this 2nd card I chose Creme Brulee, Olive, Desert Sand and Out Door Denim inks.
This card was designed to have a more natural feel to it and I dry embossed and inked the Desert Sand cardstock in the matching ink to give the feeling of a fence. 
The new Chevron Out Door Denim ribbon adds texture as does the Silver Shimmer Trim Tape.
 This is a beautiful layout which I am teaching at a class later in the month. This time Blush and Sweet Leaf inks are used along with Bamboo ink to texture the Bamboo cardstock using a 'direct to paper' technique and Desert Sand ink along with D1544 Distressed Backgrounds for the 'chicken wire' background on the cream cardstock. I used the Sweet leaf paper from the Chantilly Level 2 Paper pack also.

 This elegant card using Ruby and Slate inks was based on a card taught by another consultant at a recent meeting. I 'blinged' it up by adding Red Glitz glitter gel to the mini rose and the Slate Satin Ribbon underneath the ruby cardstock. A few pieces of Silver shimmer trim added even more sparkle.
Hope you like the artwork with this stamp set and don't forget to contact me if you would like it for its discount price of just $5 (retails at $17.95)
Love Sara xxx

Friday, March 08, 2013

Color My Heart - Guest Designer

I was very excite to be asked by the Color My Heart Blog team to be a guest designer.
The Challenge? To use 2 different paper packs on one item.
Well for those of you who know my OCD tendencies - this was WAY out of my comfort zone - you all know how I like everything to match !!!

Anyway - I came up with this 3" x 6" card which features Chantilly and For Always papers.
The base I made from CTMH white Textured card-stock.
I then added a piece of the Green Chantilly paper and added texture and sparkle with a piece of Sweet Leaf Ribbon and the new Black Shimmer Tape.
The blue background?? That is the black and white paper from For Always which I graduated ink 
sponged with Twilight, Crystal Blue and Sky inks and the Texture Tools
I also ink distressed 2 Milepost Shape stars - one with Sky Ink and the other with Twilight. I painted them both with Create a Shade Pearl Paint, then added liquid glass to the smaller one. 
Another piece of the Black Shimmer Tape was added to the large star.
Rosette ribbon added softness to it & a Cricut cut flower with the center filled with the 
Stardust Glitter Glitz Gel added more height.
Finally the sentiment is from the Avonlea Card-making kit .
I had fun with this challenge and hope it inspires you to mix your papers :O)
Love Sara x