Thursday, August 14, 2014

Gone Fishing Boys/Mans card

Oh I do like this card - it makes a change from always dong flowers and just because its for a boy or man doesn't mean its can't have lots of details :O)
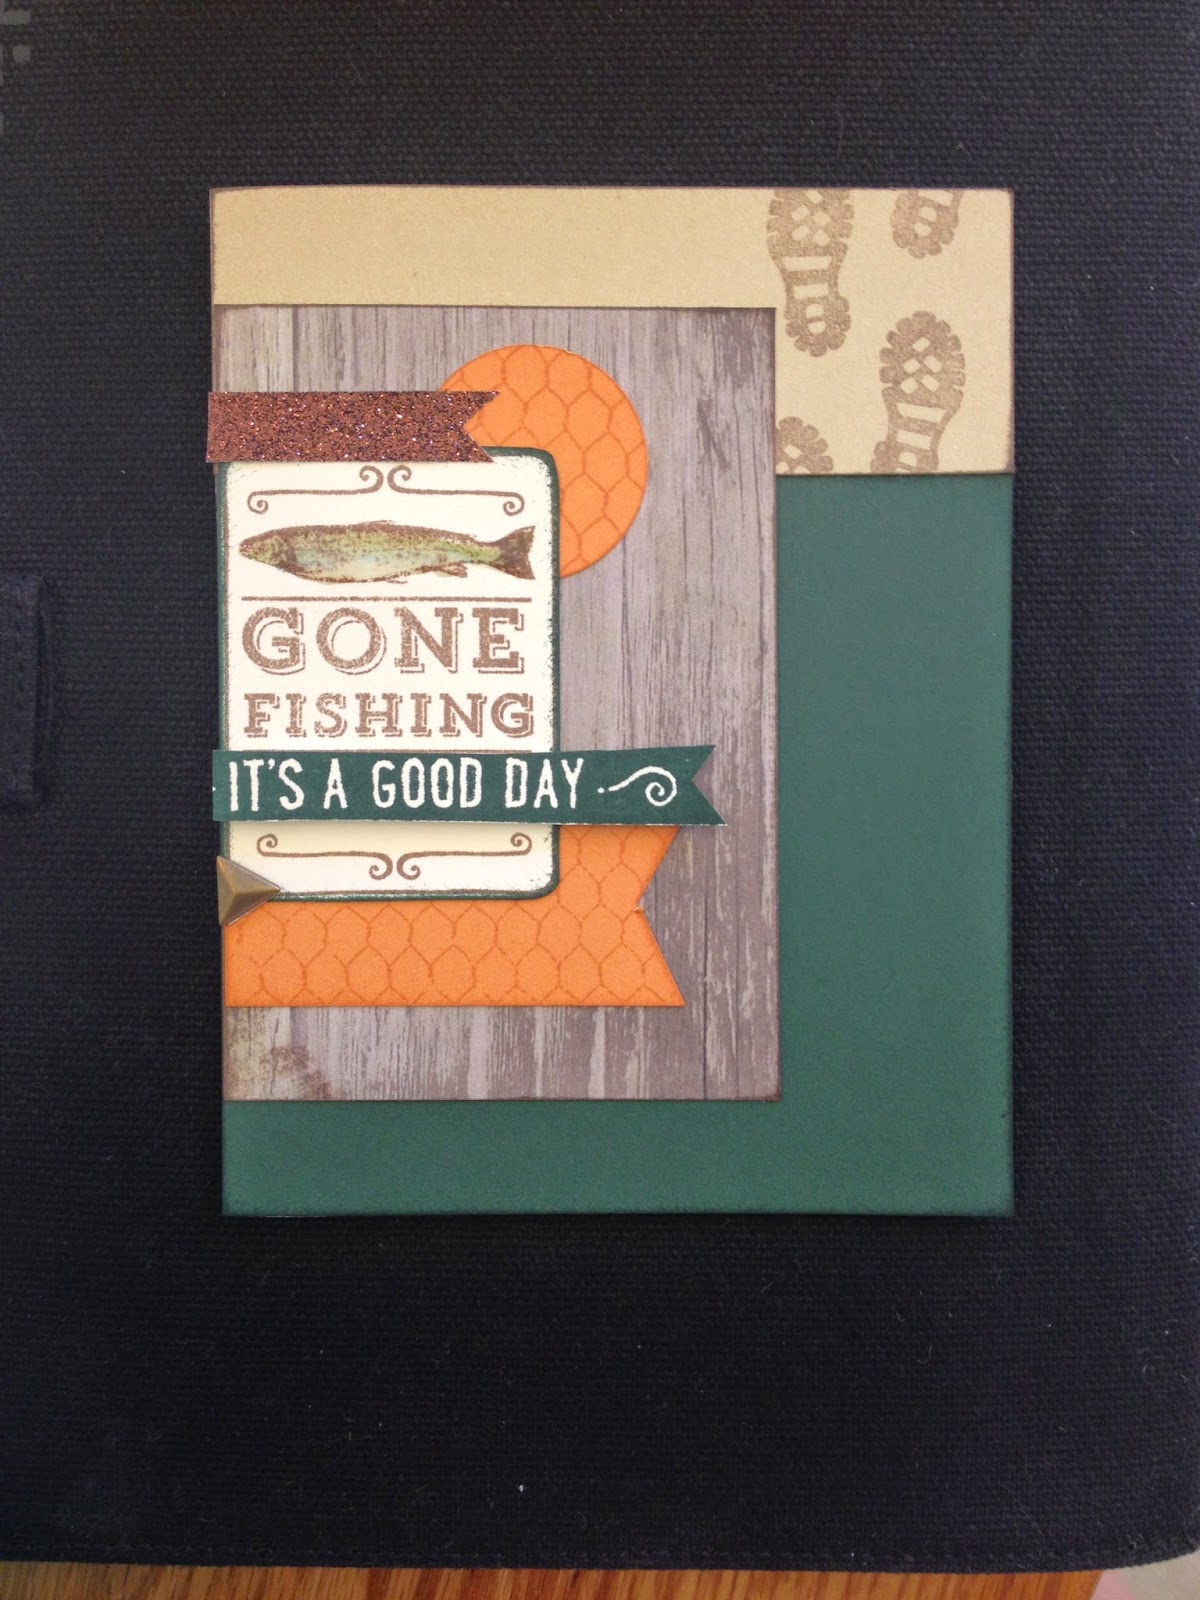
I used Ponderosa Pine cardstock at the bottom and bamboo at the top - love those boot prints.
I used the Timberline paper but you could use any neutral paper pattern or even use the new Woodgrain Embossing folders we now have - they are awesome :O)
I stamped the chicken wire design from the Distressed Background stamp set in Goldrush ink on the Goldrush cardstock and stamped the Gone Fishing in chocolate ink. I colored the fish using the watercolor pencils - Dutch Blue and Olive.
The final touches were the sentiment stamped in Ponderosa Pine ink and popped up on 3D foam tape, the Triangle stud and a small piece of Bronze shimmer trim.
And last but not least when the card was complete - I added a layer of Liquid Glass to the fish to make it look wet and the help the colors of the pencils blend with the chocolate ink. It gave it a cool look.
Hope it inspires you to make one for the man in your life :O)
Love Sara xxx

Wednesday, August 13, 2014

Choker Style Necklace and Matching Bracelet - Extravaganza

 Here is another way to use the long necklaces. I tend to wear shorter necklaces so this was a great way of getting more of a chunkier look to offset the weight of the pendant pieces.  
The first Pendant piece with the Eiffel Tower has glitter cardstock inside the pendant.  I then added the Tower Charm and Liquid Glassed it to the rim of the Pendant. On the middle section I used the Cameo image from Storyteller Style Sheet. It is designed to fit the smaller Base and Bling pendant pieces so I added it to the larger oval pendant and then added some of the gold tone glitter paper to hide the gap. last Pendant again has the gold Glitter cardstock in the base with the crown charm liquid glassed directly to it. A sparkle decorates the top of the crown and more charms hand at various points around the pendants. I made the connection point in the front so that the extension chain acts as another charm effect.
I used the same techniques to create the matching bracelet but this time used the camera charm in the first section which I cut the hanging loop off and as a 'piece de resistance' added a tan sparkle to the center of the camera as a lens. As you can see I kept to the smaller circle shaped pendants for the bracelet so the Cameo design fitted beautifully.  Again I added more charms for more decoration.
Here you can see them as a matching set. I was really happy with the result :O)
Hope you like them too - Love Sara xxx

Tuesday, August 12, 2014

Family Love Pendant - Extravaganza

 Here is a fun way to wear our Base and Bling pendant pieces - especially if you don't care to wear a chain with your pendant. Here I threaded 2 square Base and Bling pendants onto the ribbon and tied them together with a simple knot. I placed them on top of each other like spoons.
I added a rose image from the Storyteller Style sheet and sealed it with a thick layer of Liquid Glass. While it was still wet I added the key charm and the heart charm. I added more liquid glass to both of these charms to add the Tan sparkle to the heart and the newGold Bling Gem to the top of the key. I added a small piece of ribbon to the top of the hanging loop for a little extra touch.
Then I made a small accordion style album to fit between the 2 pendants. I then used more of the word images from the same Storyteller style sheet to fit the sections. On the alternate sections I stamped a tiny heart in Hollyhock ink. I glued the bottom end into the bottom pendant and the top end to the back surface of the top pendant. I added a tiny piece of brown glitter paper to disguise the join where the paper attached to the top pendant.
Hope you like it as much as I do :O)    Love Sara xxx

Saturday, August 09, 2014

Leo's Graduation

 Yes here we all are, my babies and I - and my lovely husband  :O)
I know - you all usually see picture of Robyn and Leo and Elliott but yes - I DO have a husband :O)
So I managed to find someone to take a picture of all of us together - this doesn't happen very often as  it is usually me behind the camera taking the photos.
I can't believe Leo has graduated from Walled Lake Central - He seems so grown up.
And here is another one of my babies - this one makes my heart melt. I am so blessed to have them. It's funny because they are all so different in character and personality yet in some ways they are just the same. They are all fiercely loyal and will be the first in line to take care of the 'underdog' in a situation. They all have a great sense of humor and a so kind hearted. They are my life and I am so proud to be their  Little Mama xxx
Love Sara x

Friday, August 08, 2014

My Time To Shine Wall Hanging - Extravaganza

Ooooooh - I was so happy with the way this turned out :O) I had a bit of an accident with the Designed Decor Flip Stand Album and managed to break the hard acrylic stand which supports the album on a desk (don't ask - it was my own fault) and you know me - waste not want not - as my mama would have said. So I dispatched Richard to the garage with the instructions to remove the rest of the horizontal piece CAREFULLY without scratching the surface LOL. No pressure then haha :O)

Bless his heart - he managed to do it and sanded the edges smooth too.
I then unscrewed the 2 decorative screws and removed the 2 ring binder piece. I re attached the screws after I had inserted the cardstock background between the 2 layers of acrylic.

I used Outdoor Denim Pigment ink to color the Slate ribbon dark blue and when it was dry - threaded it through the holes and re-attached the screws.
I used one of the new Rectangular Pendants using 3D foam tape and used the words from the 'Journey Style Sheet'. More Ribbon threaded through the top of it allowed me to add a Star charm to it . I love the new Black Arrow Washi Tape which I layered over the Seaside Paper (think this has to be my new favorite paper).
A photo of my lovely boy before his Senior Homecoming party and a photo of the school logo and lots of the Brown/Tan Glitter paper finished it off nicely :O)
Hope you like it as much as I do - Love Sara xxx

Thursday, August 07, 2014

Antique Gold Circle Rose Pendant - Extravaganza

Here is a pendant where I altered the connection point of the chain by adding a jump ring from the charm. This way I was able to make this double loop of chain with the pendant hanging on the lower pice - I added a key, rhinestone and bow charms to disguise those jump rings and added the Rose image from the 'Storyteller Style Sheet' for a very Victorian feel to this. I used Liquid Glass to attach the glass cover to the pendant.
Hope you like it - Love Sara xxx

Wednesday, August 06, 2014

A close up of yesterdays pendant :O)

Yes - I have had a couple of emails from ladies asking "Please - do you have another photo of the very burry necklace from yesterday??"  Well yes I do - this shows the stitching in far more detail so I hope this helps. Make sure you adhere the 2 pieces of cardstock/paper together really well before you start piercing and then stitching it together.
Love Sara xxx

Tuesday, August 05, 2014

Base & Bling Pendant #1 - Extravaganza

Finally - I have caught up with my life a little and I am able to start posting some of the photos of my Extravagana artwork - and I have to apologize for the slightly blurry image. Good Grief !! Im a scrapbooker for goodness sake - I should be able to take a photo.!!!  
I have no excuses I was tired and thats all :O)

Anyway this pendant is made with 2 of the cardstock pieces from the new
'In The Pink" My Crush assortment.
I glued the 2 pieces together and then took single strand from the Neutral Bakers Twine and using the Stitch Guide to make the holes, 'cross stitched' the 2 pieces together along the join.
I attached it to the pendant base with Liquid Glass and then added a very thick layer of Liquid Glass to seal it. While it was still wet I balanced the tiny heart charm in the corner with a Bitty Sparkle to disguise the hanging loop.
When it was completely dry (3 days) I added the arrow to the back of the pendant.
I moved the connection pint of the chain to give this more of a 'lariat style' to this necklace and added another arrow and rhinestone above the pendant.
Hope you can forgive me the blurriness and hope you like it :O)
Love Sara xxx

Monday, August 04, 2014

Oh My Goodness !!!

If you have visited this blog in the last hour you would think that the whole site has been turned upside down.
For some reason Blogger changed my template - so I have spent the last hour trying to get everything back where it was. Still have no idea how to center the title LOL.
SO don't panic if it all changes yet again - I will keep fiddling with it until I am happy with the final result :O)
So I will keep this short and carry on playing !