Showing posts with label Chantilly. Show all posts

Wednesday, January 29, 2014

For Always My Creations Star

This pretty decorative Star was made in the Spring and I don't think I posted a picture of it so I apologize if I did
I started with the My Creations Star and then added the For Always fabric. I just used Tombow Mono Adhesive on the front of the start to hold the fabric in place and then glued the cut edges on the back of the star with liquid glass.
The fabric flowers were made from the For Always fabric - the pink one I used the pigment ink to color the white and black fabric.
The Green flower is made using the Chantilly Fabric with a layer of the Black Tulle Ribbon.
I inked the Color ready Seam Binding ribbon with the Pear marker and then used Liquid Glass to attach Filigree Charms to the centers of the flowers and to attach the flowers to the star.
It was a really quick project - only just over an hour :O)
Hope you like it - Love Sara xxx

Friday, January 10, 2014

Family Mini Album in a Bag

Here is another project which I submitted for Extravaganza 2013.
The base is the My Creations 6x6 Memory Showcase album.
I made the handles and the sides from Burlap Ribbon. and featured the Chantilly paper pack.
The flowers and leaves were cut using the CTMH Art Philosophy Cricut cartridge and as usual I used the Bonding Memories Glue pen and Prisma Glitter to make the flowers sparkle.
I used a Dimensional Element Heart and inked it with Desert Sand ink. I then rubbed a layer of Create a shade pearl paint over the ink and when it was dry then stamped the word LOVE from my absolutely favorite set D1482 Love Life.
I think added a layer of Liquid Glass to make it shiny. I did exactly the same process on the tiny wooden bird and used Crystal Blue ink before the paint and Liquid Glass.
I pleated the Chantilly Fabric and also added the key from the Brocade Assortment.
I also added a wooded flourish from the Wooden Mini medley which had the same treatment as the wooden bird and cut another flourish with the Cricut cartridge from the Twilight cardstock
Inside the Bag I added a collection of mini albums made from 8x5.5 cardstock bases which I folded in half to make 4x5.5 mini books.
Here I used the Cork alphabet which I added more liquid glass to and used the piercing tool to decorate the edge of the scalloped cardstock.
Here is a close up of the Dimensional Element Heart - I covered it with paper - then Prisma glitter and tucked a pleated piece of Chantilly fabric behind it.
I added Clear Sparkles to the paper at the bottom of the paper.
Here I just folded a length of Chantilly fabric and attached it at the back with liquid glass.
This little heart was inked and then I added a layer of Liquid glass and then dipped it into the Prisma Glitter.
On this lager heart I added the Chantilly paper and then a Clear Sparkle and then a layer of Liquid Glass.
This heart had the fabric attached to it - then a Sparkle and then Liquid Glass :O)
Hope you like it - Love Sara xxx

Thursday, January 09, 2014

Be still and know that I am God Prayer Box

Here is another of my Extravaganza 2013 artwork submission pieces and again I had an idea in my head and it worked out exactly as I wanted it to. 
I created this to put small prayers in it - something that I could just dip in and pull out a prayer for the day.

You would be proud of me I actually mixed 2 paper packs together which for those of you who know me well - know that that is WAAYYYY out of my comfort zone lol.
I used the CTMH My Creations Kraft Container along with the Chantilly and For Always paper packs. 
I started by rubbing a thin layer of Create a Shade Pearl paint to the container and lid to give it a shimmer.
 I made many flowers cut from 1" through to 2" and all the sizes in between from the Chantilly paper and added Clear Sparkles to the centers. I cut the leaves at 1/2" from the Sweetleaf cardstock - all of these images are found on the CTMH Art Philosophy Cricut Cartridge.
I used the Silver Shimmer Trim on both the lid and main body of the container.
I gathered the Black tulle ribbon with black waxy flax to give it the 'Tutu" feel.
Here is a close up of some of the flowers  and leaves. I used the glue pen and Prisma Glitter to add more sparkle to the project.
 I also added the Small Sparkle Clear Flourishes on the container for even more 'Bling'
 So there you have it - a sparkley, shimmery, flowery container which I absolutely love - hope you do too :O)
Love Sara xxx

Monday, April 08, 2013

My Sunshine - March Stamp Of The Month

 What a fun Set :O)  I am loving the great Spring/Summer feel to these cards - banishing the Winter Blues !!
The first card uses the new Claire Level 2 paper pack as I love this Sunset colored diagonal pattern.
Cocoa cardstock forms the base and I added a touch of Outdoor Denim Ink, Chocolate Ink and Sunset ink.and cardstock and lots of Clear Sparkles. This is one of the cards my classes will be making this month.
 On this next card I dry embossed the background and then ink distressed with Desert Sand Ink.
Again I used the Claire Level 2 paper Pack - this time the Denim print paper.
I cut the Hot Air Balloon balloon 6 times and stamped it in Sunset ink and layered them to give them a fun flower feel.
 This summery card has a Topiary Heat Embossed background with sanded Creme Brulee Cardstock
I stamped the Hot Air Balloon in Pear ink  and then Rolled the edges in Topiary to give it a shaded look.
 This lovely card featuring the Tommy Level 2 paper pack was made by my dear friend Victoria Fage and I fell in love with it. She added a piece of Burlap Ribbon and a large pewter brad from the Brads Metal Assortment  for texture.
 Claire Level 2 paper is featured on this card. I stamped the bird in Chocolate ink and added the wing ink Sunset ink. I stamped the new D1544 Distressed Backgrounds on the Cashmere cardstock. The Outdoor Denim Chevron Ribbon is perfect for this card. The flower is made using the 2" Scallop Punch which is fan folded and cut on every other fold.
This card was inspired by a card made by the very talented Aaron Brown. 
I used Chantilly paper on this little 4x4 card. I used Cotton Candy cardstock and patterned paper and the Cotton Candy Ink for the bird for a very monochromatic look. I cut the birds wing out of the green paper from the kit. I distressed everything in Cocoa Ink.
I scalloped the bottom edge with the Corner Rounder and added Pink Glitter Gems and the Rosette Ribbon.
Hope you like them - Love Sara xxx

Friday, April 05, 2013

Chantilly Scrapbook Workshop On The Go Bracket Frame

Here is the frame which I made after being inspired by the artwork on page 16 of the 
2013 Spring/Summer Idea Book. I used the Chantilly Scrapbooking WOTG.
I started with the My Creations Bracket Frame and painted it with the Pearl Paint and the brush in the Texture Tool set. I added the Chantilly Fabric to piece of thick chipboard which I cut to fit.
I used the paper and cardstock in the Workshop on the go to make the flowers and leaves which I cut out using the CTMH Art Philosophy cartridge. The flowers were cut at various sizes the largest being 3.5" and the smallest being 1" - I used the Quilling Tool to roll the flowers.
I added a pink sparkle from the WOTG to the center of every flower.
Some of the flowers were sponged in Cotton Candy Ink. Other flowers I added Prisma glitter to using the Bonding Memories Glue Pen. I also added new Wooden Mini Medley - first I rubbed the wooden pieces on the Cotton Candy Ink Pad then added Liquid Glass to them. 
I stamped some of the leaf shapes using the stamp set which comes in the WOTG ink Pear ink and then added Liquid Glass which when it was dry gave them more of a yellow/green shade.
I wrapped the Chantilly fabric around a length of Burlap Ribbon to make the fabric stiffer - and stitched it on my sewing machine. Then I looped it on the frame and made a faux bow.
I used the small journalling area stamp from D1526 Family Tree to make the tags for the letters and used one of the most popular alphabets D1469 Polka Dot Alphabet for the word WELCOME.
The hemp bakers twine and buttons come from the Mini Medley.
Finally I added everything to the frame with Liquid Glass and added the Chantilly Buttons - again they come in the WOTG kit - to add even more texture.
 Here is a close up of some of the flowers
This shows how I stacked some of the flowers on top of each other to add more dimension.
I absolutely LOVE the way it turned out and hope you do too - Love Sara xxx

Tuesday, April 02, 2013

Chantilly Scrapbooking Workshop On the Go

 This is the super cute stamp set in the Chantilly Scrapbooking Workshop on the Go
I love the different segments and what is even more fun is that they fit PERFECTLY into 
D1545 Wheel of Life which is featured on page 77 of the Spring/Summer 2013 Idea Book .
I really like the leaf image which has a swirl feel to it and the fun mini phrases are perfect for pages or cards.
On this 3"x6" card above I used Pear ink to stamp the leaf in the top right hand corner.
The scallops were made with the Corner Rounder with the guide taken off.
I then added the holes with the Piercing Kit.
The pretty little flower was cut out on using the CTMH Art Philosophy cartridge
The more I looked at the segments I could see other images which could be created - so made this fun birthday card by making one of the segments into a party hat with a glitter button on the top of it with a Clear Sparkle in its center.  I dry embossed diagonal lines into the Sweet leaf cardstock and then heavily ink distressed it ink Sweet Leaf Ink. I sponged Cotton Candy ink onto the Black and White Grosgrain Ribbon.
As soon as I saw the segment with the leaves on it I knew it would make the cutest little tree.
I added Sparkles to it and used a small scrap of the Pear and partridge paper.
A little piece of Burlap Ribbon - frayed on all 4 sides - added a more country feel to it.
Well I hope I have given you lots of ideas with this set.
Love Sara xxx

Saturday, March 30, 2013

Chantilly Cardmaking Workshop On The Go

 
I do love this card featuring the Chantilly Cardmaking Kit.
The ink of Lagoon, Sweet Leaf, Sunset and Desert Sand. This combination makes it perfect for boys or for girls. I made this one without the flowers to make it more suitable for a boy.
I added Liquid Glass and Prisma Glitter to the icing on the layers of the cake and onto the candle flame to add some sparkle.
The bow was made from the CTMH Artiste Cricut Cartridge and secured it with a Pewter Brad from the Metal assortment.
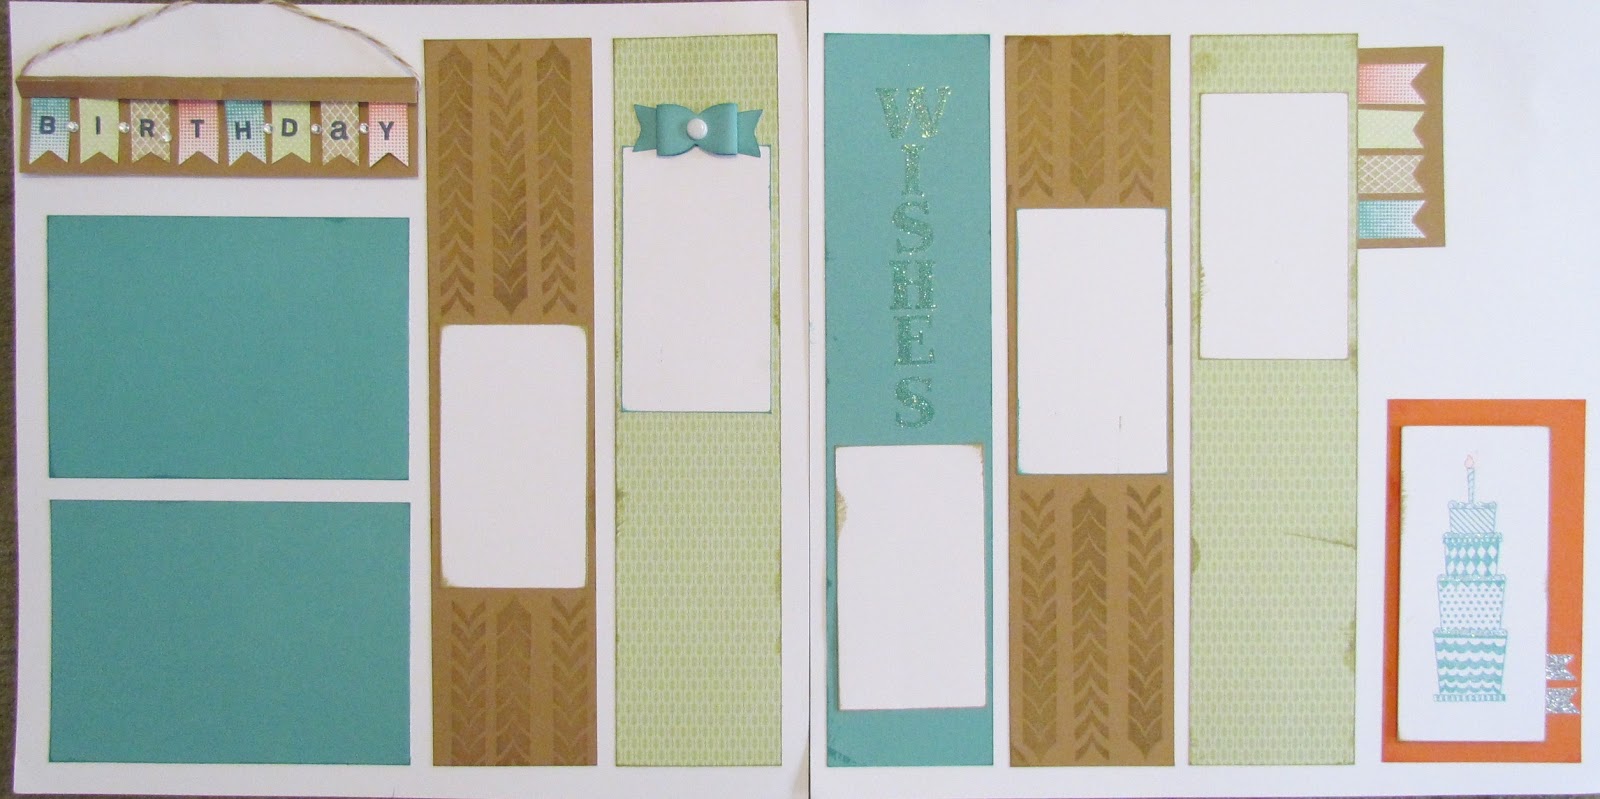
I decided to show the versatility of this kit and created this fun layout using the stamp set which is included in the card-making it. I think it is just perfect for this layout. I used the same ink colors as on the card.
I did add a couple of alphabets to this layout.
The word 'Birthday' was stamped using A1117 - A Typeface and Outdoor Denim ink and the word 'Wishes' used one of my favorite sets D1507 - Urban Alphabet.
Two pieces of Silver Shimmer Trim added more sparkle to the Birthday Cake accent piece and 
Clear Sparkles added some bling between the letters of 'Birthday"
Hope  you like it as much as I do :O)
Love Sara xxx

Friday, March 08, 2013

Color My Heart - Guest Designer

I was very excite to be asked by the Color My Heart Blog team to be a guest designer.
The Challenge? To use 2 different paper packs on one item.
Well for those of you who know my OCD tendencies - this was WAY out of my comfort zone - you all know how I like everything to match !!!

Anyway - I came up with this 3" x 6" card which features Chantilly and For Always papers.
The base I made from CTMH white Textured card-stock.
I then added a piece of the Green Chantilly paper and added texture and sparkle with a piece of Sweet Leaf Ribbon and the new Black Shimmer Tape.
The blue background?? That is the black and white paper from For Always which I graduated ink 
sponged with Twilight, Crystal Blue and Sky inks and the Texture Tools. 
I also ink distressed 2 Milepost Shape stars - one with Sky Ink and the other with Twilight. I painted them both with Create a Shade Pearl Paint, then added liquid glass to the smaller one. 
Another piece of the Black Shimmer Tape was added to the large star.
Rosette ribbon added softness to it & a Cricut cut flower with the center filled with the 
Stardust Glitter Glitz Gel added more height.
Finally the sentiment is from the Avonlea Card-making kit .
I had fun with this challenge and hope it inspires you to mix your papers :O)
Love Sara x